Tuesday, May 19, 2015

Dance Team Captain Sash DIY


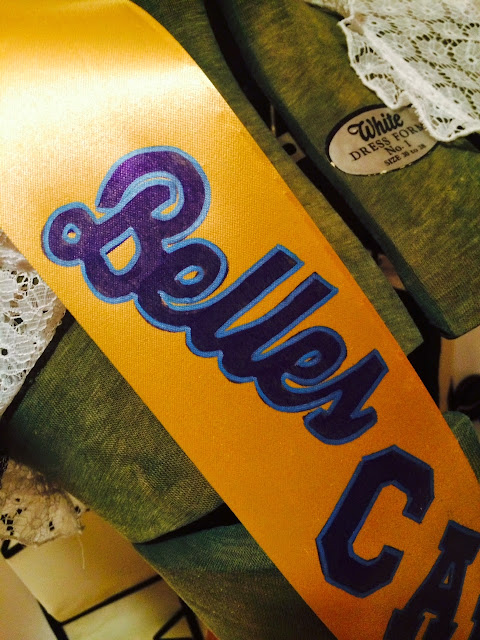
I've got a little extra time today, so I thought I'd squeeze in another post! As any of my readers know by now, I'm a dance team mom and I like to make the team fun little goodies.  This time around it was a simple sash for the new team captains.  And, you know that feeling when you think something is going to be really easy the way you've planned it out...then it goes all wrong? This was one of those times.  I started just as I do with many of my projects, with a trip to my local JoAnn's. I bought floral ribbon instead of satin fabric ribbon to save a bit of money...a mistake.  At home, I sewed the shoulder seam at just about a 45-degree angle on what would become the right shoulder.  I cut the ends of the ribbons at alternating angles so it would look pretty when crossed on the hip.  I also finished these ends with some metallic ribbon I had on hand (see below).  With the sashes made, I made a stencil out of contact paper on my Cricut, and painted the negative space with acrylic paint.  Sounds good, right? Well, not so much.  I think because floral ribbon is basically waterproof, the paint just peeled right off along with the stencil. Oops! 
Stenciling gone wrong.


Not one to give up easily, I used the other portion of my stencil and outlined the letters with a Sharpie.  Then, I peeled off the stencil and filled in the letter with the marker. It looked a little plain so I outlined it with a metallic blue Cricut marker, perfect!  I figure if you don't have a Cricut, this method would work with store bought vinyl letters so it's a better solution all around.  Now, I do have a picture of the girls wearing their sashes...but I won't post that without their approval (they are the selfie generation, after all)! Needless to say, they loved them and will make great team captains for the upcoming season! Go Belles!
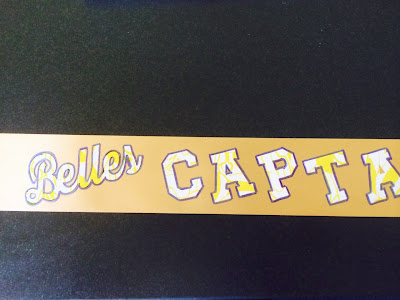
Outlining the letters with Sharpie

Every project needs some glitter, right!?

Finished Sash!


A Nautical Sweet 16!

I can hardly believe my oldest daughter has turned 16, but it's starting to sink in every time I look at the beautiful young lady she's become.  I thought I'd take this opportunity to share a few of the decorations, invitation and food items we made for her party...or should I say parties! We got the wild idea to have two parties back-to-back, one for family at 2 o'clock and one for her school friends at 7 o'clock. It actually worked out great, even if it did make for a long day, because then I only had to "company clean" my house once.  To make it simple, I made twice the amount of everything and split it between two sets of platters and servingware.  I didn't take as many pictures as I should have, but you know how it is when you're hosting a gathering! 

The whole party started with an invitation I designed in PrintShop.  As with most of my party invites, I used the large box of blank cards (with envelopes) available at Target ($9.99 for 50). My daughter wanted the oh-so-trendy nautical theme with a monogram in hot pink and navy blue.  I downloaded a free copy of Ballerina Script and Little Lord Fonteroy from dafont.com, and found a free anchor clip art online.  And, since I needed invites for two separate parties, I simply changed the time information leaving everything else the same.  


For the finishing touch on the envelopes she was hand delivering, I addressed the envelopes for her school friends on my Cricut machine in metallic gold ink.  


Nautical Tablecloths


Decorations came next. Knowing my daughter wanted her parties outside, we did the set-up on our back patio.  I strung up some large white Christmas lights off two corners of the house and joined them on a wood post I positioned in the far center of the patio in an old galvanized drink dispenser (held in place with some bricks and gravel). I embellished the raw wood post with Dollar Store white lanterns hung at varying heights, shell necklaces and some small pink anchors ($0.50 at JoAnn's). Hopefully, one of my guests took a picture that I can share at some point, because I didn't!  For the food and drink tables, I made some little square tablecloths using an anchor print fabric from JoAnn's and hot pink seam binding tape. As for the flower vases, I had found two wine bottle bags with anchors at my local Marshall's store and just slid a couple wine carafes inside and filled them with flowers from my yard. A hot pink doll adirondack chair and a huge monogram M finished off the tables.  All of Maria's friends signed the M with metallic gold sharpie to make it a keepsake to hang in her room.


So onto the food...I purposely held the parties outside regular meal times so that I could just serve light snacks and desserts. For snacks, I assembled a popcorn based snack mix (popcorn, pink & white animal cookies, mini-marshmallows, mini Nilla wafers), a vegetable tray, watermelon wedges, "Cowboy Caviar" with chips, peanuts in the shell and a jar of red vines (to tie in the nautical rope idea).  To make it feel like a seaside clam bake, most everything was served in large pots with scoops, and colanders lined with waxed paper for the rest.  To keep the drinks simple as well, soda was put in large galvanized buckets, and old-fashioned lemonade was given a ocean blue twist using Kool Aide mix (add a little extra sugar, cause that stuff is tart!) 


 For dessert, frosted anchor and star shaped sugar cookies using two recipes (one for cookies and one for royal icing) from the site Sweetopia, cupcakes with piped anchor decorations sprinkled with pearl nonpareils, and a small cake to hold the giant "16" birthday candles.


Lastly, the favors...salt water taffy in small glassine bags with a tag made to match the invites.  I formatted them as you would a business card to fit lots on a page when printing.  

That wraps it up, and I hope you found some ideas to use at your next party, nautical or otherwise, to make it memorable.

Thanks for sailing by!

Friday, May 15, 2015

Diamond Back Weaving Projects...Blooming Pen & Dance Fan Wand


A pen in bloom ;)
Let's begin with my first ever shout-out to a fellow blogger (theartfulcrafter.com) for teaching me something new...diamond back weaving! I'm a very visual person, so I really appreciated the photos in her blog to get me started (Mine are not great, I apologize!).  Now, I must say I'm not from the South so I didn't know anything about homecoming mums (gasp!), but I guess this form of weaving is widely used in the making of them.  I switched it up a bit and did my diamond back weaving around some ordinary ball point pens for our dance team competition gift table (so they wouldn't walk away), and for some spirit sticks for our fans at the recent state competition.  I had so much fun I even made a ribbon wand for my niece, which I forgot to photograph!  Anyway, I'm not going to include directions here because in addition to the blog I mentioned above, there's also some YouTube videos that clearly show how to do it.  I'm simply sharing my take on how to use this pretty technique.  And, I will share a couple of tips to make the two projects pictured here.  

First, the pen.  I bought a couple of bunches of small scale flowers in the team's school colors and taped the stems (wrapping the tape around the stem and pen in two places) down the length of the pen.  Then I made the two-color sections of narrow grosgrain ribbon (glue the ends of one of each of the ribbons at an angle, tucking the ends), hot glued those to the pen's tip and worked the braid up the pen to the top end where it met the flowers. I glued again here, and made bows with the ribbon tails.  I finished it with a jewel for some sparkle, it is dance team after all! Our customer's just loved them, and thought they were for sale so maybe I'll make some to sell in the future!
Second, the spirit stick or fan wand. My daughter's team is the Liberty Belles, so I cut a Dollar Store Christmas garland I had been saving to add a bell to the end of the wand.  It came on a string of little plastic gold beads, so I just cut it between the bells and tied the ends into a loop using some button hole thread. Then I used a small piece of ribbon to glue it up and over the end of the stick before doing the braid.  For this project, I used inexpensive satin ribbon from JoAnn's in the school's colors.  And, instead of making the two-colored sections like for the pen, I just took the lengths of ribbon and glued them across the end of the little dowel I used (also from JoAnn's) and started the braid that way.  Here's a hint...the wider the dowel, the wider you're ribbon should be.  This is a 1/4" ribbon around a 1/4" dowel.  As I'm explaining all this, I feel it might be a little confusing but trust me once you get the hang of this braid it will all make sense!  So, to finish off this project, I just tied some extra gold ribbons into the tails of the braided ribbon to add the last of the 3 school colors.  Oh, and a looped a few around the top of the bell.  I made 20, and it made for a nice effect when the fan section were all waving their ribbons at once! Go Belles!

I'm thinking this would be a fun team bonding activity for the summer, so I'll keep you updated if we can fit that into the schedule!  Take care!

Spirit Stick -- Fan Wand