Monday, August 8, 2016

Dance Team Make-up Bags...Another Dollar Store Upgrade!

     Happy Monday! As promised, I'm back with another dance team craft project today. My girls just had their first annual team sleepover on Saturday night, so my oldest daughter and her co-captain wanted to make it extra special.  And, what's more special than some personalized goodies to kick off the season!  After quite a bit of online searching for inexpensive make-up bags with no success, I was planning on just making them. But, as luck would have it, we dropped by our local Dollar Tree store to pick up the items to fill the bags and happened upon these cute insulated lunch totes in a perfect light blue!  Now here's the upgrade...when I returned home, I did some simple lettering on my Cricut Design Space in navy solid iron-on vinyl using a varsity style lettering and blue glitter in a bold script font.  To set the captains apart, I swapped out the blue glitter for gold.  
    Now, as you can imagine, these are not high-end bags.  That means you need to use extra care when applying the vinyl with an iron by using an old pillow case or similar weight pressing cloth. Also, the insulated backing sort of sticks to the outer nylon layer after the ironing (which initially freaked me out!) but I just pulled the layers apart and it looked back to normal.  Here's a photo step-by-step to get you started. Oh, and just for fun, we personalized the hairbrush handles with regular navy vinyl too! The bags were then used as their place cards at the dinner table.  The captains had found quotes they felt represented each girl and taped them to the inside of the bags, which made them even more personalized. The bags were filled with matching lipstick and eyeliner, gum, bobby pins, hair elastics, and hair brushes.  The girls loved them, and I love seeing a coordinated team.  It's a win-win!

The swag.  Of course, each girl will add their own supplies too!
(Note: We ended up swapping out these brushes for some that better matched the color of the bags.)


Unzip the top and lay flat before ironing!

Step One: Iron-on the names, 1/2" above seam line and centered.
Use the heat setting recommended by the vinyl company and a pressing cloth!

Step Two: Iron on the script team name, centering over the name. It's okay if they overlap a bit!


Here you can see how the layers sort of stick together after ironing,
but just separate by grabbing the top and inner layers of fabric and pulling!

Added a bit of ribbon to the zipper pull in the team colors!
A dap of hot glue will help hold it securely.

The finished bags...they loved them!

A closer look at the brush handles (done with Thirsty Script Extra Bold font).

The Captains get a little extra gold lettering on their brushes!

The aftermath.  Why is it I always forget to take a picture before the fun happens!?!

Thursday, August 4, 2016

It's Your Time to Shine! - Dance Camp Favor

Hey there! This summer is flying by way too quickly for me, how 'bout you?! When doesn't it, I guess would be the answer.  My girls are off to dance camp this week, and to keep up with my tradition of sending little treats for the team I came up with this sunny favor card.  Here's a quick bit of photo inspiration (in other words, no tutorial included) if you're looking for an inexpensive little favor to send along with your favorite team.  I made mine on my Cricut Explore using a free sun image, a Hershey Kiss and simple lettering. As you can guess, you can easily make it freehand...but once you use the Cricut it's hard to go back! I'll be back with another post next week, after the team sleepover Saturday, but for now it's a surprise! 


Wednesday, June 22, 2016

A Trio of Ballet Bags to Sew!

 As promised, I'm back with today's second project.  And, if you read my last post you'll note that I said this project was for inspiration.  I'm a bit busy creating these days and didn't have time to take you through this project step-by-step with photos and instructions.  But, if you have some pretty basic sewing skills I know you can recreate the look!  This trio of ballet bags started with a one yard remnant bought at my local JoAnn store. I had some white lining fabric, so I used that to give a really finished look but of course that's optional.  The solid pink fabric was some left-over t-shirt sleeves that I held onto after cutting them off to make dance team tank tops last summer...waste not, want not! And, lastly, I used my Cricut and some iron-on vinyl scraps to make the little ballet logo (same as used in the previous post) to give it that little touch of sparkle.  So there you have it, I made 2 large bags, one medium and one small clutch style out of just one yard of fabric.  Be sure to comment any questions you might have...and, happy sewing!

The logo...silver iron-on circle, plain white iron-on slippers.


For the fashionista...the clutch style!

Medium Bag

Large Bag, (approx. 12 x 18 finished size) with white on white logo

Ballerina Notepad & Pen Gift Set or Favor


Hi! I'm back with a couple projects today, first this quick and easy Cricut/Silhouette project, and the second a sewing project to inspire.  These "Ballerina Notepad & Pen Sets" were made for the dance studio recital gift table I've been preparing for lately, but like many of my other projects, they could easily be made as birthday party favors or class gifts. They start with Dollar Store notepads and pens, both priced at just $1 for 3 of each!  Then using my Cricut Design Space software, I uploaded a cute free clip art of ballet slippers from the internet and attached it to a layered set of circles (so I could remove the negative space around the slippers.)  Since it's just a 3" circle logo, I was able to use up some vinyl scraps to decorate the notepads.  Lastly, I designed a super simple tag (a square with a score line down the center and some text) to finish the project off after slipping the set inside a cellophane pouch.  I plan on selling them for $2 each, a profit of $1.34 each, just in case you were wondering. Stay tuned...another project coming your way momentarily!


Monday, June 13, 2016

"You were born to Twirl & Swirl" Dance Recital Favor


When I'm creating little favor gifts like this one, I often start simply by looking for products that will appeal to little ones and giving it a dance-themed spin. So, I usually find things when I doing my regular grocery shopping.  And, if you've read my blog at all, my life these days sort of revolves around my daughters and their dance team.  Lest you think that's sad, this time I have with them is so very fleeting that it brings me great pleasure to do even these little projects in support of their team.  And, it provides me with a creative escape from the mundane.  Enough said. 

Here's the breakdown...start with healthy fruit roll-up snacks. Measure the package and design your tag to fit.  Cut or use a cutting machine to cut out little sparkly paper bows. Write or use a cutting machine's pen attachment to write and cut the cute little tag.  Staple the tag to the roll-up, and use a hot-glue gun to cover the staple with the bow.  All done!  

Little bows are the perfect way to use up scraps from a previous project!

I like to use card stock weight paper for tags... it just looks better!


Vary the colors for interest when on display!


Quick and cute dance recital favors!

"Your dancing is...Magical!" Dance Recital Favors


They say a picture's worth a thousand words...so here you go!

Your dancing is...Magical! Recital Favor

Okay, so I can't just leave it at that.  But, since I don't know how to share Cricut files this photo is just to serve as a little inspiration! These tags were made for some packages of Disney Frozen cookies (I mean...who's more magical than Olaf!) and were written using a standard Cricut-style pen, and a fine tip for the first line (Your dancing is...). I then used a glue gun to adhere the little jewels.  I attached with a staple at either end, but you could put a dab of hot glue at each end as well.  As I mentioned in my earlier post today, these will be sold at a dance recital gift table and I think any little dancer will be tickled to get one!

Dance-themed Fleece Pillow Sham


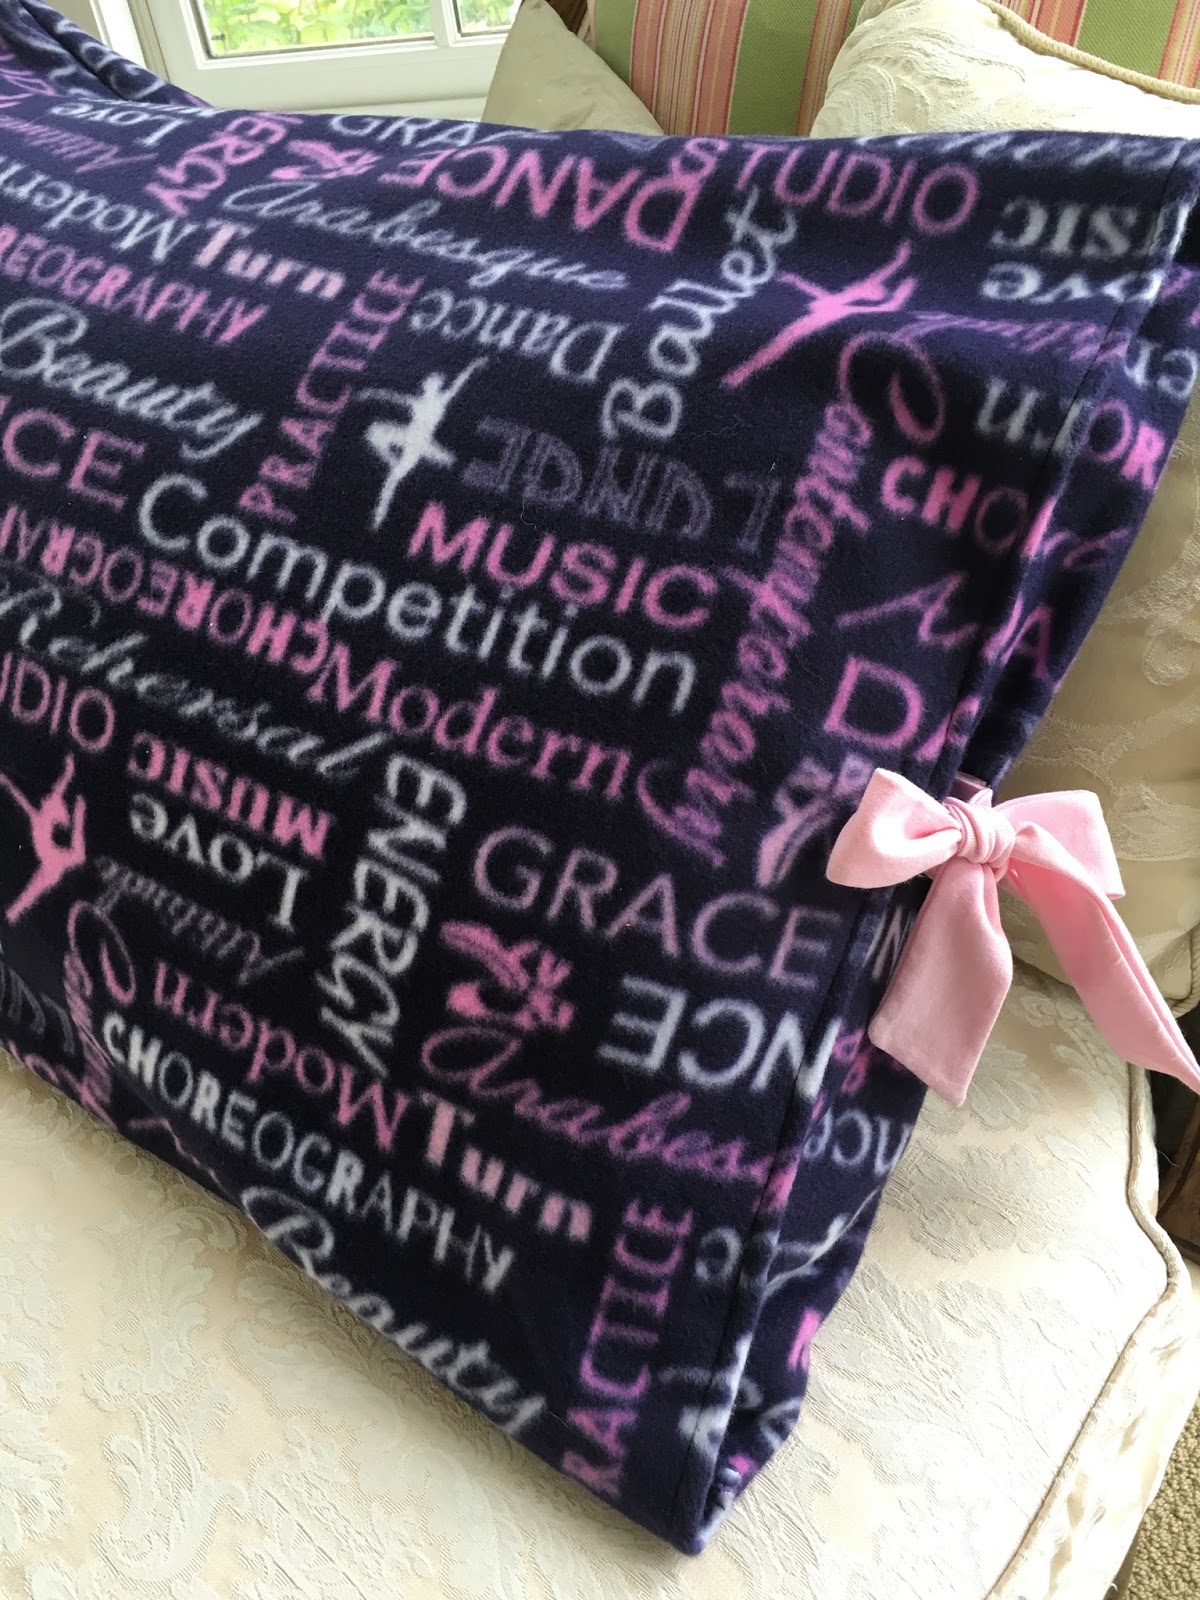
It's Monday...but it's the last week of school!  Everyone in my household is on cloud nine, including me!  I thought with summer impending upon us, I better share some of the projects I've been working on before the house is a little less quiet.  My daughters dance team is hosting a gift table for a local dance studio's recital in a couple weeks, so I've been busy working on some quick grab n' go type gifts.  Here's the first...a dance-themed fleece pillow sham.  I found this cute dance print fleece on sale for just $4.99/yd at my local JoAnn store, and with just two yards I was able to make three standard size pillow shams and one no-sew scarf.

Here's what you'll need:

  • Fleece (Yardage depends on size & number you're making, but I cut each sham 22" wide.)
  • Two 3-1/2"x 16" T-Shirt Knit Strips  (So...since I rarely throw things away, I had been saving t-shirt scraps from the girls camp shirt project since last summer.  And, that's what I used!)
  • Thread
  • Sewing Machine
Step One:

Cut your fleece to size, measuring along the selvedge edge 22" for a standard pillow case.  Trim the selvedges off the piece (that's the portion of the edges that generally have writing and loom holes on them.)  Now, I wanted my sham to have the little fold on the inside that hides the pillow (see photo below). So, folding one end back 6" with wrong sides together you create this pocket before sewing the side seams. I didn't finish the raw edge because I didn't want the bulk and fleece doesn't fray.  But, you will need to finish the other raw edge that overlaps as it will show. Just fold under 1/2" and stitch (see photo below, right).


Step Two:

With right sides together, lining up the finished edge to the folded edge, sew side seams.

When aligning side seams, be sure your flap is on the outside! That way it will be inside when you turn it!


Step Three:

Photo taken before I tapered the ends!
Prepare t-shirt strips to make the ties by simply cutting to length.  I then tapered one end at an angle because that looks more professional to me, but your choice! At this point, just put right sides together (Hint: With t-shirt knit the fabric tends to roll towards the right side at the edges.)  Sew a narrow seam along the tapered end and the long edge, leaving one end open. Turn right side out.


Step Four:

Measure sham to find the center of the opening on both sides and mark with a pin.  To attach the tie, fold it under to hide raw edge and sew two rows of top stitching for security. One to the side with the finished edge, the other on the folded flap. (Hint: Be sure to match your thread to the color of your fleece and tie. For example, I had navy in the bobbin and pink in the top thread.) 


Step Five:

Insert pillow, working it under the flap you created inside the pillow. Form the ties into a bow. Voila! You're done!

Finished Sham...cozy and practical!

Here they are rolled and packaged in cellophane for the gift table!