Monday, June 13, 2016

"You were born to Twirl & Swirl" Dance Recital Favor


When I'm creating little favor gifts like this one, I often start simply by looking for products that will appeal to little ones and giving it a dance-themed spin. So, I usually find things when I doing my regular grocery shopping.  And, if you've read my blog at all, my life these days sort of revolves around my daughters and their dance team.  Lest you think that's sad, this time I have with them is so very fleeting that it brings me great pleasure to do even these little projects in support of their team.  And, it provides me with a creative escape from the mundane.  Enough said. 

Here's the breakdown...start with healthy fruit roll-up snacks. Measure the package and design your tag to fit.  Cut or use a cutting machine to cut out little sparkly paper bows. Write or use a cutting machine's pen attachment to write and cut the cute little tag.  Staple the tag to the roll-up, and use a hot-glue gun to cover the staple with the bow.  All done!  

Little bows are the perfect way to use up scraps from a previous project!

I like to use card stock weight paper for tags... it just looks better!


Vary the colors for interest when on display!


Quick and cute dance recital favors!

"Your dancing is...Magical!" Dance Recital Favors


They say a picture's worth a thousand words...so here you go!

Your dancing is...Magical! Recital Favor

Okay, so I can't just leave it at that.  But, since I don't know how to share Cricut files this photo is just to serve as a little inspiration! These tags were made for some packages of Disney Frozen cookies (I mean...who's more magical than Olaf!) and were written using a standard Cricut-style pen, and a fine tip for the first line (Your dancing is...). I then used a glue gun to adhere the little jewels.  I attached with a staple at either end, but you could put a dab of hot glue at each end as well.  As I mentioned in my earlier post today, these will be sold at a dance recital gift table and I think any little dancer will be tickled to get one!

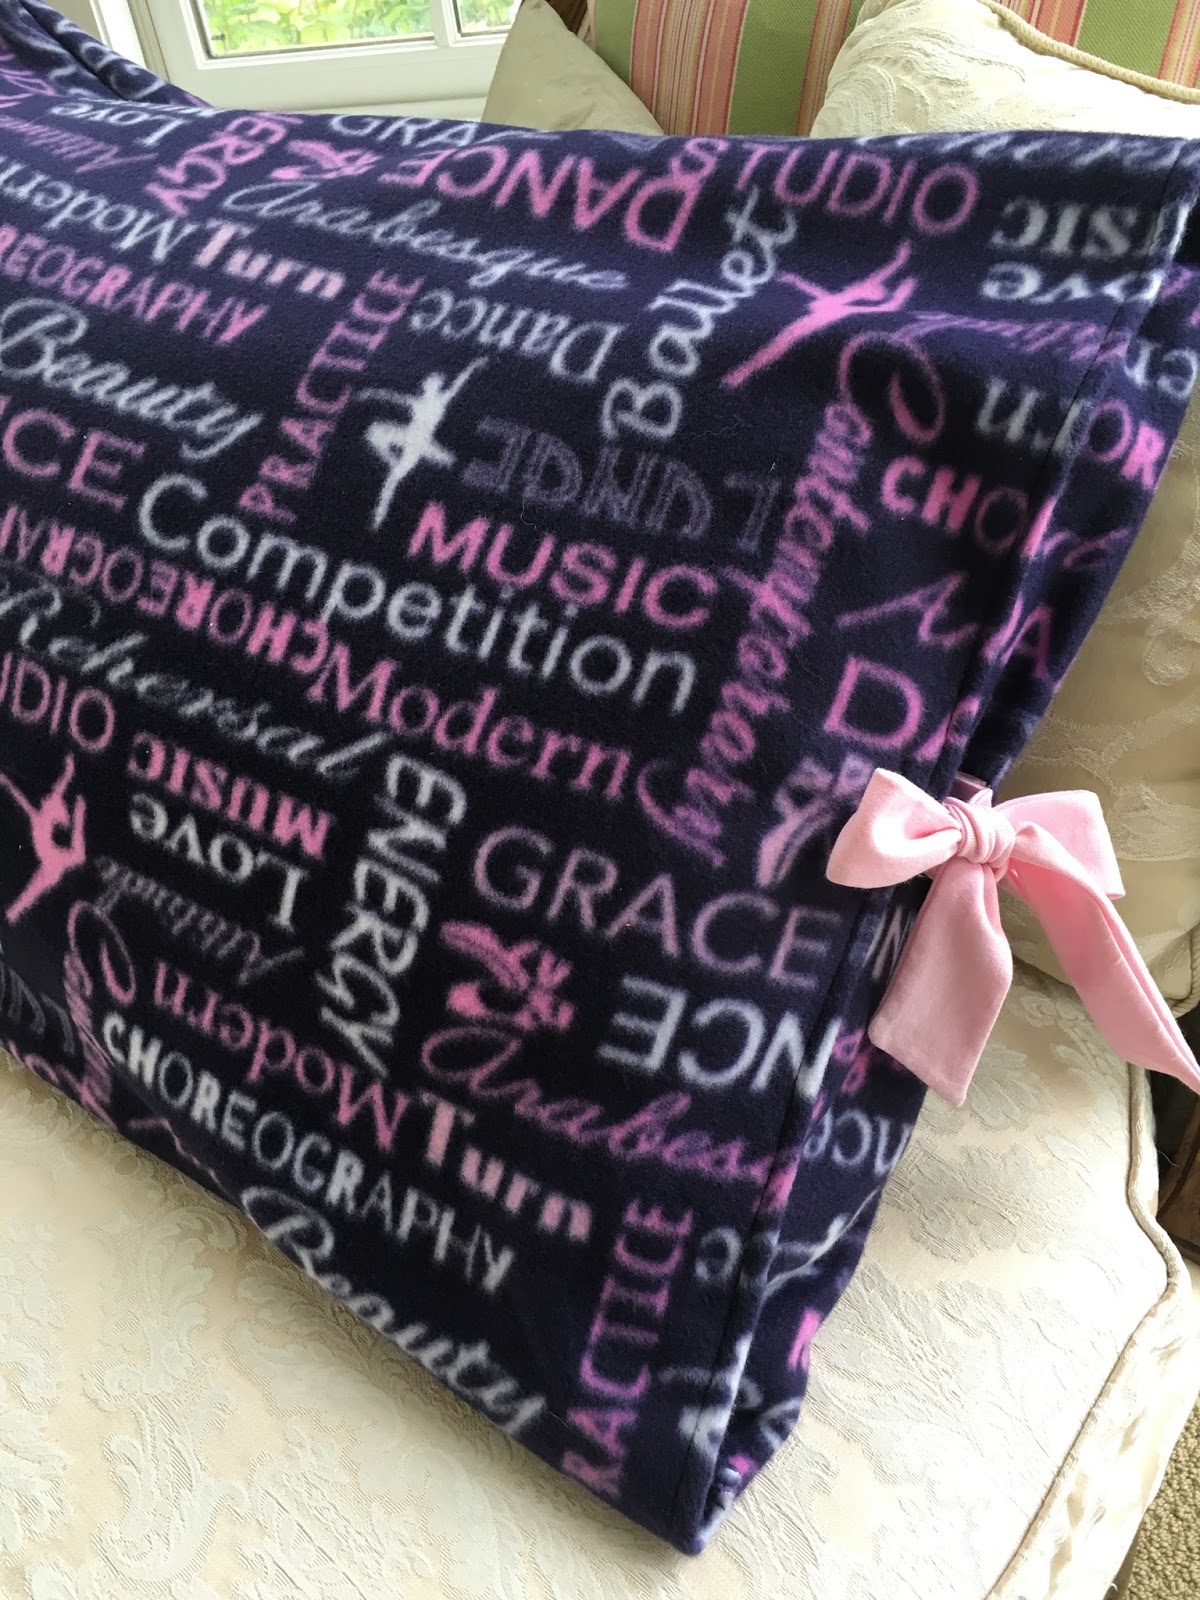
Dance-themed Fleece Pillow Sham


It's Monday...but it's the last week of school!  Everyone in my household is on cloud nine, including me!  I thought with summer impending upon us, I better share some of the projects I've been working on before the house is a little less quiet.  My daughters dance team is hosting a gift table for a local dance studio's recital in a couple weeks, so I've been busy working on some quick grab n' go type gifts.  Here's the first...a dance-themed fleece pillow sham.  I found this cute dance print fleece on sale for just $4.99/yd at my local JoAnn store, and with just two yards I was able to make three standard size pillow shams and one no-sew scarf.

Here's what you'll need:

  • Fleece (Yardage depends on size & number you're making, but I cut each sham 22" wide.)
  • Two 3-1/2"x 16" T-Shirt Knit Strips  (So...since I rarely throw things away, I had been saving t-shirt scraps from the girls camp shirt project since last summer.  And, that's what I used!)
  • Thread
  • Sewing Machine
Step One:

Cut your fleece to size, measuring along the selvedge edge 22" for a standard pillow case.  Trim the selvedges off the piece (that's the portion of the edges that generally have writing and loom holes on them.)  Now, I wanted my sham to have the little fold on the inside that hides the pillow (see photo below). So, folding one end back 6" with wrong sides together you create this pocket before sewing the side seams. I didn't finish the raw edge because I didn't want the bulk and fleece doesn't fray.  But, you will need to finish the other raw edge that overlaps as it will show. Just fold under 1/2" and stitch (see photo below, right).


Step Two:

With right sides together, lining up the finished edge to the folded edge, sew side seams.

When aligning side seams, be sure your flap is on the outside! That way it will be inside when you turn it!


Step Three:

Photo taken before I tapered the ends!
Prepare t-shirt strips to make the ties by simply cutting to length.  I then tapered one end at an angle because that looks more professional to me, but your choice! At this point, just put right sides together (Hint: With t-shirt knit the fabric tends to roll towards the right side at the edges.)  Sew a narrow seam along the tapered end and the long edge, leaving one end open. Turn right side out.


Step Four:

Measure sham to find the center of the opening on both sides and mark with a pin.  To attach the tie, fold it under to hide raw edge and sew two rows of top stitching for security. One to the side with the finished edge, the other on the folded flap. (Hint: Be sure to match your thread to the color of your fleece and tie. For example, I had navy in the bobbin and pink in the top thread.) 


Step Five:

Insert pillow, working it under the flap you created inside the pillow. Form the ties into a bow. Voila! You're done!

Finished Sham...cozy and practical!

Here they are rolled and packaged in cellophane for the gift table!


Thursday, June 2, 2016

Dance Recital Luggage Tags...Free Printables!

  Since this is my second post of the day, I'll keep it short and sweet! Literally! Here are two sweet printable sheets I thought I'd share for dance-themed luggage tags (including a couple for boys).  I'm printing and laminating these cuties to sell at a recital gift table next month.  I posted detailed instructions for this project back in June of 2014, just search tags in the blog search box and you'll see them.  And, once my printer decides to cooperate, I'll post some pics of the finished tags...but for now, here's the printables! 

Enjoy!


Dance Travel Pillow...Take Three!

  Hello! On this rainy Oregon morning I thought I'd share a few pictures of some pillowcases I made using "fat quarters" I purchased at Walmart for just 99¢ each, and embellished with scrap pieces of glitter vinyl cut on my Cricut machine. Unlike my two previous posts that were made for high school dance teamers, these pillow and case sets were made to sell at a dance studio's recital gift table...so picture young dancers!  I kept these designs super simple because I was using scraps, but they'd be really cute personalized with your little dancers name too!  For complete directions, just view my earlier post on travel pillowcases from February 2015.


Tuesday, May 24, 2016

Super Sparkly Personalized Water Jug


So, I just might have an addiction to this floral diamond wrap from The Dollar Tree. It's just so darn shiny! All kidding aside, here's another quick project for any of you out there looking to spoil someone with (plastic) jewels.  Of course, these were made for my little dance-teamers but they'd be really cute for lots of uses...like sorority big/little gifts, your favorite trainer at the gym, or a kid going off to camp!


What you'll need:

  • Diamond Wrap (9ft/$1 at Dollar Tree)
  • Large Water Jug (Bought mine from the grocery store.)
  • E6000 Glue (Please use with the window open, it stinks!)
  • Vinyl Lettering (Made mine on the Cricut, but you could purchase ready made letters too.)
Step One: Lay Out Design
The design kind of depends on where the ridges are positioned on your particular jug, but I suggest keeping it simple.  It will make the gluing step much more successful.  I was lucky enough to find the diamond wrap in my daughters' school colors, so that made it pretty easy to nail down how I wanted it to look. After you've decided on a design, pre-cut your strips of wrap to the desired length (you may want to use a bit of tape at this stage if it's shifting around a bit). Don't forget you can cut the strips lengthwise, as well, if you want narrower rows of gems.

Step Two: Glue Diamond Wrap
Using a glue recommended for use on plastics, carefully glue wrap to bottle in the desired design.  Be careful not to use too much glue, as it will push up through the wrap's webbing.  I used a small craft paint brush to apply the E6000 directly to the bottle.  And, starting a one end of the strips, I applied the glue in small sections.
Important:  LET DRY COMPLETELY!

Step Three:  Apply Vinyl Lettering
If you've made your own lettering, just use the standard method for vinyl transfer using transfer tape.  

Reminders...a project like this cannot go in the dishwasher.  Just use a gentle hand when rinsing in the sink, and do not soak it as the letters will probably come off unless you've used water proof vinyl!


Have fun, and be sure to post your designs in the comment section!


Friday, May 20, 2016

Blingtastic Personalized Mini-Notepad

   
Pull out your glue gun folks, 'cause here'a a really quick and easy project for your weekend!  Around here it's dance recital and dance team try-out time, so I made these cute little notepads as a congratulatory gift for my girls.  They always have little notes or reminders from their coaches, and I thought the notepads would come in handy for staying organized.  But, I think they'd be great little favor gifts for a little girls birthday party, too!  I'm thinking of making matching pens with some of the leftover diamond wrap, and I'll post them when I get a chance.

Here's all you need:

  • Glue Gun
  • Glittered Mini-Notepads (Dollar Tree, 2/$1)
  • Floral Diamond Wrap (Dollar Tree, 9ft./$1)
  • Scissors


Step One:  Simple...heat up your glue gun! While it's heating, layout your design. In order in use all of my daughter's high school colors, I cut the diamond wrap down to single strands. For the letters, I made simple block letters using the full width of the diamond wrap.  But here's where you can get creative, because I think it would be fun to use a single strand if you wanted to do a more curvy style of lettering (i.e. a monogram font.) And, yes, you can cut straight through one of the stones to get the shape correct for your letters as they are just plastic.

Step Two:  Glue down the diamond wrap!  Once you are happy with your design, work in small sections so the glue doesn't set before you press the diamond wrap into it.  Too much glue will push up through the webbing and not look so good, and you'll be fighting the little string-y bits like crazy. I like to use the tip of the glue gun to gently push the diamond wrap into the glue beneath, just don't apply any pressure to the trigger or you'll have a big mess!


That's it, you're done! Now go enjoy your weekend!


Personalized Blintastic Mini-Notepads!